After creating the
cabinet boxes for my kitchen last year, I was inspired to do more. I have worked with wood before, but for some reason this time, the whole process really resonated with me. The smell of the sawdust after making a fresh cut, the sound of the hand planer as it takes thin curls off of the surface, the feel of the wood once it's been sanded and finished...it just made me smile and gave me a deep sense of satisfaction. In addition, I found myself relaxing for the first time that I can remember in decades. My mind went quiet every time I started working, which was pretty amazing to me. I had been so stressed at my previous job for so long that my shoulders never relaxed and my mind was never truly quiet until I picked up my carpentry tools and started really working on my kitchen. After completing the two cabinet boxes, I wanted to do more which meant that I wanted to learn more.
I looked around town at all of the options I could find and concluded that the most cost-effective approach was to take a class at
Metropolitan Community College. So I enrolled in Intro to Carpentry. Having just come away from a loooong stretch of graduate classes, I thought I was a little crazy for going back for MORE school - seriously, enough school already! But this was a completely different subject and ended up being SOOOO worth it.
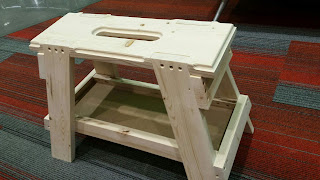
Here's a picture of my final project. It's not perfect but now I know how make it (and any other projects) better in the future.
There were 9 of us in class, each making our own bench but all working together. The class was completed as of earlier this week, and I'm sad that it's over! I am going to miss the other students and the instructor and the zen of working in the shop with all of the fun toys...er, I mean, tools. A lot of the tools were new to me. I have to admit that I had some trepidation when we used to table saw for the first time, but on the final night as we finished up our projects, I realized how much more confidence I had in using the big tools. At one point, I messed up a piece I was working on and needed to re-plane and re-cut some wood from scratch. And I did all of it without hesitating.
At the end of each class session, I took pictures of my project as it progressed in anticipation of sharing them here with you. My hope is that this is just the beginning for me.
MCC also offers classes for framing, interior finishing, exterior finishing, demolition, cabinetry and trim finishing... My mouth waters and my fingers itch when I read the descriptions, and I am definitely planning to take
all of these more classes as time and money allows.
But without further ado, here is my Intro to Carpentry class summarized in photos.
 |
| Pieces cut for jigs. |
 |
| Two jigs, mirror images of each other, to route out spots for the bench legs |
 |
| Bench top, with leg placing routed out and hand hole cut |
 |
| Top routed and smoothed |
 |
| Top routed and smoothed, with legs cut |
 |
| Legs attached, and shelf runners cut with dados |
 |
| Et, voila! Final bench! |


Good job!! What are you going to use the bench for? Incidentally, you are speaking a new language too!!
ReplyDeleteThanks! (And thanks for reading and commenting so consistently, Marilynn. I always enjoy hearing from you.) So far, the bench is sitting in my entryway and I have used it a time or two to take my shoes off when I get home. I'm not sure where it will ultimately end up. I thought about painting it but I really like all of the knots and markings on the wood and hate the idea of covering them up. I actually chose some of the pieces and placement of them for the markings and imperfections so I think I may just seal the wood to protect it. Ultimately it might end up under a window or even stay in the entryway.
Delete