One of my favorite art teachers used to say that we learn more from our failures than from our successes. (He also used to say that just because you didn't agonize over it doesn't mean it's not good art...which is my favorite take-away from his class.)
This most recent silk dying attempt was successful in that I learned what doesn't quite work. However, it looks nothing like what I set out to create.
I previously read through Art Cloth by Jane Dunnewold and decided to try two particular resist techniques that she discusses in Chapter 6 of her book, the first being with water-soluble glue (like Elmer's Blue School Glue) and the second being with flour paste.
I started with the glue resist. Prep included laying down a sheet of wax paper to protect my work surface. I used my ironing board for this so that I could also pin down my fabric.
Here's a closer picture. I originally dyed this fabric using an acid dye bath; you can find more about the process in this post.
I then added the glue to the surface of my fabric, using the tip of the glue bottle as my tool for applying the design. The white areas that you see in the picture below are where the glue was applied.
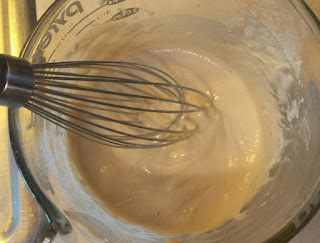
I let the glue dry completely and then I mixed up the flour paste resist. The basic recipe is 1 cup of white flour to 1 cup of cold water. Add the cold water to the flour slowly and whisk continually until the mixture is smooth. It should have the consistency of pancake batter (this info found on p. 117 in Art Cloth).
I then applied the flour paste to my fabric using a spatula, making it thicker towards the outside edges and thinner as I approached my other resist design that was made using the glue.
I then let the flour paste dry and crinkled the fabric slightly to cause the dried flour to crack on the surface. After that, I applied Jacquard Silk Colors dye in Digital to the surface of the fabric near the area of the glue resist design (this is where I wanted most of the contrasting color to be).
After allowing the dye to set on the fabric, I very carefully rinsed the dye and resists off. The flour paste came off in very odd chunks that I mostly peeled off of the fabric surface. Once the flour paste was completely removed, my fabric looked like this (below).
The water-soluble glue was more difficult to remove and took a lot more time and labor to get out of the fabric. I essentially ended up picking the white layer of glue off of the fabric very slowly. During this process, I also set the purple dye with a solution of water and white vinegar. The picture below shows the final result.
My original intention was for more purple around the glue resist design with it fading into the apricot color towards the outer edges of the fabric so that it would show a definite circular design in apricot created by the glue resist. It didn't quite turn out that way.
Not that it's not pretty in its own right. It just doesn't look anything like what I was going for. Next time, I will be less generous with the flour paste resist when applying it to the fabric. I will also go glue shopping and see if I can find a more water-soluble glue than the glue that I used in this experiment.


I bet you liked to make mud pies as a child!!
ReplyDeleteI may have a memory or two of making those. :)
Delete