I have worked at my place of employment for quite a few years, and as a result, I have accrued much vacation time. During the Summer months, I often try to take at least a couple of weeks off, regardless of whether or not I go anywhere special (typically during one of those weeks, I have my annual Star Wars and/or Harry Potter marathon, complete with sweater knitting). By a stroke of luck, I happened to choose my first vacation week of this summer during the week before Memorial Day. This means that I have my normal week of vacation plus one additional paid holiday to enjoy. And this year, I have decided to blog about my daily creative activities.
Today I made Homemade Creamy Ceasar Salad Dressing using two separate recipes found here and here. I love many of the recipes that I find on ruled.me. While I have only tried a handful, they have always turned out tasty and satisfying. Craig's Ceasar Salad Dressing recipe calls for 3/4 cup of mayonnaise. Most commercial mayonnaise is made with soybean oil or other vegetable oils. I don't want to knock these ingredients but based on some other nutrition research that I have done, I tend to shy away from these oils and opt for olive, walnut, avocado, flax seed and coconut oils instead.
*Disclaimer: By no stretch of the imagination am I a doctor or even a nutritionist, and I am a firm believer in doing your own research and deciding for yourself what is right for you. That being said, in my own opinion, not all oils are created equal. Wellness Mama has a really good blog post about the difference between Omega-3 and Omega-6 fatty acids. And (also referred to by Wellness Mama) Chris Kresser has a great article on How too much omega-6 and not enough omega-3 is making us sick. More and more research is coming out about brain function, chronic disease and healthy fat consumption. At some point, I will put together a comprehensive list of the books and movies with which I am familiar...but anyway, I digress.
Following this recipe for homemade mayonnaise...
Juice 2 Meyer lemons (or 1 regular lemon).
Carefully separate your egg. There are egg separators available but I find the best one is my hand. I always collect the egg white and use it in another recipe, preferably within 24 hours.
To the egg yolk, add:
1 1/2 teaspoons of lemon juice
1 teaspoon of white balsamic vinegar
1/4 teaspoon of pub mustard (personally, this is the only mustard that I like)
1/2 teaspoon sea salt
Whisk these ingredients together until smooth and liquid.
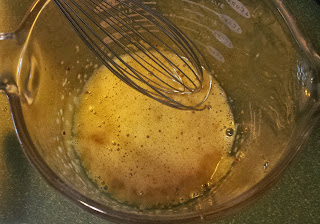
SLOWLY add 1/4 cup of olive oil, about a teaspoon at a time while whisking continually. Be sure to take your time with this step in order to ensure that the oil becomes fully incorporated with the rest of the liquid. As you slowly mix in the olive oil bit by bit, the mixture should become a little thicker and more creamy. Your basically making an oil and water emulsion, and if you are interested in knowing the science behind how mayonnaise works, you can find some basic explanations here and here, for starters. Oh, how I love food chemistry!
Ahem...anyway, once you have added the first 1/4 cup of olive oil very slowly, you can add the remaining 1/2 cup of olive oil in a slow, steady stream while you continue to whisk your mixture. Once it is completely incorporated, it will look more like the picture below.
I find that using olive oil gives my mayonnaise a slight green tinge to the overall color (not that you can see it here). The pub mustard that I like has whole mustard seeds in it which adds a slight texture (hence the dark dots in the picture above).
Once your mayonnaise is mixed, you are ready for the other ingredients that make the creamy ceasar dressing.
Using the original recipe here as a guideline, combine:
1 teaspoon dried garlic
1 1/2 teaspoons of anchovy paste
2 tablespoons of lemon juice
1 1/2 teaspoons of pub mustard
1 teaspoon of Bragg's Liquid Aminos (usually used as a soy sauce alternative but I sometimes use it as a Worcestershire sauce alternative as well)
These will make a rather thin liquid once mixed.
Again in a slow, steady stream, add the garlic/anchovy paste/lemon juice mixture to your homemade mayonnaise, whisking continually until the mixture is smooth and creamy. Your final mixture will be thinner than your mayonnaise alone but should still be creamy.
And voila! The entire process took me about 20 minutes total and made about 10 oz of dressing. The final product is tangy from all of the lemon juice and vinegar but has a touch of heartiness from the anchovy paste and liquid aminos. I have never used anchovy paste before and have decided that this is an ingredient that I need to explore further.
Refrigerate immediately. Homemade mayonnaise should last easily for 3-4 days minimum. I may give this item 5-6 days of shelf life given the other ingredients that are included, but I will be surprised if it's not consumed before then. The taste and texture remind me a little bit of hollondaise sauce, so I will be using this on chicken and other meats as well as on my salads.
Bon appetit!


Comments
Post a Comment